Monday, March 15, 2010

Mast glued up, rudder and daggerboard glassing.

Ok, another frustrating boatbuilding day here in New Hampshire.

The mast got glued up today in a long session.  It takes a deceptively large amount of glue.

First, I laid down the mast ladder frame, with the two sides to be glued next to it.  I primed the wood to be glue with unthickened epoxy, and then made up the thick stuff.  Application of the glue went along the base plug, narrow staves, and ladder framework.  Afterwards, I picked up the ladder section and placed it upside down on the wide stave.  The other side of the ladder was then glued up and the wide stave dropped onto that, making a sandwich.  Mr. Storer recommends a clamp every foot.  I only have 9 clamps that can be used on the mast.  Mr. Storer advises his customers to use packing tape... use a clamp, wrap the mast with packing tape to hold the pressure, move on.  This method has been used by other Goat Island Skiff builders, successfully.  It kind of worked for me, but not to the degree I would have liked, the clamps hold more pressure.  Regardless, better than nothing, and with some careful maneuvering I was able to make sure that all gaps were closed up.


It took longer than I thought, and a lot more glue than I thought.  There were a few areas where I really had to force the staves into position, and this was a pain.  For some reason I don't have any real overlap in the lower half part of the mast or I could have used nails to hold it in place.  I used my muscles instead, and clamped them down, and hoped for the best.  In  a few locations there's an overlap on one side and an underlap on another... not much, about 1mm, but I see it, and it pisses me off.  I should be building to tighter tolerances by now.  I don't know if it's impatience to get this done with, or it's a level of meticulousness that drives me batty.

Off to check the bottom runners, shall we?

Oh look, gaps!


 In my quest to use less glue (I keep throwing out tons of squeezed out glue) I went with what I thought was a moderate amount of glue... but it obviously wasn't enough.  These are, surprisingly, my worst scarfs on this boat yet.  This is not the end of the world, I can force some glue in there, they are not necessarily under pressure (that would compromise the scarf) and they will fully glued onto the hull.  So this is not the end of the world.

This is:


My daggerboard.  What a mess.  I was so concentrated and focused on making sure I got it smooth around the end of the board, I didn't really care what happened along the edges of the glass.  I figured I could sand it smooth later.  Now, I'm realizing I really screwed myself up the wazoo.  This clean up job without going through the soft wood of the board is going to murder my day tomorrow.  UGH.


Sunday, March 14, 2010

Rudder stock design #4, Mast gluing

In yet another installment of "I try to re-design the rudder stock" I have received yet another set of plans from a Goat Island Skiff builder in New York.  He has graciously supplied me with these two schematics of his own design, as a solution to removing the tiller from the rudder assembly without having to take the rudder off the transom.  It is self-explanatory:


I really like this design, it is better than mine for two reasons:  1. It maintains Mr. Storer's rudder stock design and hopefully solves the structural issue that he was concerned about, 2. There is less time fiddling over the transom pulling very critical pins over water of yet-to-be-determined depth, if you get my drift.  I can remove the tiller from the safety of the cabin.  Unfortunately, I will still have a stub of tiller sticking into my domain, but I think, for now, this is the idea I'm going to go with.  The great thing about the rudder stock is that it is simple and easy to construct, I can always make another.

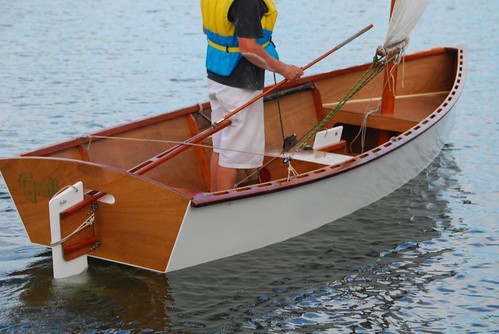
In other news, the mast was glued in its first step today.  In the previous post, I shaped the narrow staves.  This was a workout, but I worked carefully, and I'm happy with the result.  Then, off to make the spacers for the ladder frame.  I used a piece of fir that was lounging around the garage, some stud material.  I used some good parts, and cut them to fit.  The base plug meant a trip to Lowes.  This is the first wood part of the boat that was not bought at either of my two local lumber stores.  Sorry guys.  Anyway, an 8' piece of 4x4 cedar.  I thought about using fir, for a few bucks less, but I went with the rot-resistant cedar.  It's an important piece, it's light, and it should be good.  The other spacers I'll goo up with epoxy and make them plastic.


Well, that was interesting how the photo's lined up, but I like it!  Notice the base plug.  After a quick mock-up my lovely wife and I took one of the uncut stave stock pieces and brought it into the basement, where I can get an even floor workspace and a slightly higher temperature, better for quicker gluing.  We made sure that we could get the wood in and out of the basement two different ways, so I don't build the mast and then get it out.  I am positive I can get the mast out of the basement.

Layed out ready for the dry fit:


Sweet, I did it again, but I don't know how.  The mast is quite straight, but I decided to use one of the wide uncut staves as a backbone for gluing, that way I could ensure that the mast is straight with no wobbles.  It also gives me a good even workspace for gluing too.  I covered one stave with packing tape, and glued away:  Notice too, the hardwood runners that will be glued to the bottom of the hull, they are long ones and needed to be scarfed.


It went well.  The bricks are slightly nudging the mast into a straight position.  You'll also notice that you don't see much of the wide stave underneath this glue-up, that's because the tolerances are super tight.  I overcut my narrow staves by 1mm and it pretty much ate up all the space on the wide stave.  I briefly considered re-planing the staves, re-working the spacers, and then gluing, but my lovely wife stopped me with some business graduate degree mumbo-jumbo stuff and talked me out of it.  I might have to plane a little extra off the base to get it to fit in the mast step, and I can (with difficulty) enlarge the mast step as well if need be.

Tomorrow, gluing the wide staves and completing the box.
 

Friday, March 12, 2010

Rudder design #3, and shaping the mast.

A little more thought into the rudder today.  Since Mr. Storer is concerned about the tiller splitting from the forces, he would like to see a thru-bolt through the tiller, into the spacer block.  So I thought, how about a removable thru-bolt that could be tightened with a butterfly nut, or something like that?  The adjusted illustration is below:


In other much more exciting news... I started shaping the mast!

This is awesome, because I'd love to see my mast.  Hmmm Hmmm mast.  Powerhouse piece of lumber that gets me from A to B for free.

I am building the Hollow Square Mast option, of three that come with the boat (Solid Round, Birdsmouth are the other two).

First off, I must loft the dimensions of the narrow staves onto my lumber.  One piece of lumber has a slight curve in it.  I didn't think too much of it, and sawed 1cm off the edge of the lumber.  Big mistake!  The curve was more than I anticipated, and I didn't think I had the room to actually loft a narrow stave!  I was seriously pissed, pounded my broom on the floor, and let out of primordial yell.  A screwed piece of lumber means 25 bucks in the hole, a trip to the lumberyard, hoping to find a piece long enough, travel up north to the planer, using the planer, then back home.  It's a process!

Mr. Storer has a fabulous option in his plans for curved pieces of lumber however, "The String Down the Middle" method.  So, I marke the middle of each end and attached a string between them, and got this:


As you can probably tell, the string is way near the edge, too close to loft the mast using this as the backbone.  I had to adjust the string to get me the most amount of wood:


Then, I lofted it on, hoping for the best... and it worked!  I was just able to get it on with a little left over.  It made for a strange visual illusion, with straight lines cutting every-so-slightly diagonally across the grain, but it worked well, and for that, I was happy.  As you can see, the top of the mast is very close to the edge:


With the mast material propped up between two table extenders and my clamp table (50lb bag o' seed keeps it from moving) I planned the staves down to the lines.


I then matched them up and got it as close as possible.  Since we're making a box here, it's very important to keep things square, equal to each other, and the same size.  This is a precision operation.  Once the staves are glued in their ladder format, the wider boards can be glued right on, and then trimmed, making life a little easier on that front, at least.  Sweet.  Mast.


Wednesday, March 10, 2010

Rudder stock design, rudder #2, daggerboard shaping

WELL

Informative day today as I peddled my rudder stock idea over at Mr. Storer's forum.

There was enough persuasion action going to keep me going with the plans in term of a backless rudder stock with a daggerboard rudder.  However, I really want to be able to ditch the tiller and leave the rudder installed on the transom.

I came up with this idea:


In this plan, the rudder stock stays exactly as the plans stipulate, except I add on 15mm at the top.  This provides an area to attach a cleat (blue).  Then there's another below it (blue) and the tiller-- which is two pieced-- cradles the rudder stock.  Bolts run through the cleats into the spacer, and the tiller which slides between the cleats is held in place with a pin.

Storer warns that the torsional forces on the tiller could tear it apart, I'm hoping that between the three cleats bolted through the spacer, and a bolt higher up on the tiller (not shown) to keep it together, I should be ok.  Time will tell.  I am almost positive this is the model I'm going with, unless I get overwhelming evidence otherwise.

In other news, I finished rough shaping the rudder and daggerboard. 


Nice.

Designing new rudder stock #1

I'm trying to build a swing-up rudder stock design for my Goat Island Skiff, similar to the one I have on my Laser, except wood, and fitted for the GIS rudder.  The original plans call for a daggerboard style rudder stock where the rudder is removed vertically through the box, and the tiller is permanently attached to the box.  See here.  I am not a big fan of this design, though I appreciate it's simplicity.

Here is why:

1.  I do not want a permanently attached tiller to the rudder stock.  I would like to be able to remove the tiller, and leave the rudder in the water, or at least raised but still attached to the transom.

2.  I do not like the bungee cord design to the hold the rudder in place

3. I want to use pintles and gudgeons, which would be difficult with a permanently attached tiller and dropping the assembly into place.

Here is a quick mock-up of a slightly enlarged rudder box per the plans, with a rudimentary rounded rudder top for swingability.


The stock has been extended 3 cm aft, and 1 cm down.  I am limited by the size of the transom and the location of the hole to accept the tiller in the transom.  The tiller would run between the two side of the stock across the top of the rudder and be fastened with a pin.  The spacer in the front of the box would be the same called for in the plans.  The exterior of the stock would have the two re-enforced areas per the plans, running across the top and bottom, and in addition a third re-enforced area to support the axle.  I will probably also trim the leading and trailing edges of the top section of the rudder in the box area to get a good climb out of the water as well as keep it from dragging along the beach.

Thoughts?