Monday, May 23, 2011

Little Chebeague Revisited

Hello intrepid readers!

Last year Al from Brooklyn and I made a camping trip out to Little Chebeague Island in Maine.  Al in Brooklyn constructed his own Goat Island Skiff, and he drove up to do a little camping.  As the intrepid reader will remember, it was blowing great balls on the way out, and it took us all day to sail back.  On Little Chebeague I realized that my precious camera had been soaked through and through-- ruined by the salt water.  Fortunately, we met two MIT (maybe Harvard? whatever-- one of those awesome schools in BOS) students doing an economic study of the MITA, and they graciously took some pictures for us.  I received them today.  Here are two:

Goat and campsite
Intrepid heroes-- author (left) and Al from Brooklyn (right)
This was a great trip.  We compared the differences between Bourbon and Rum on a nautical adventure, and explored the cosmos from our beach looking up into a starry sky.  The Bourbon/Rum debate needs more analysis, and the cosmos are awesome.  What more should I say?  Additionally sailing is quite cool, we decided.

Sailing season is almost here, intrepid readers, so bottoms and up and get your boats ready!

Monday, May 16, 2011

Payson Joint repair

Ok, intrepid reader!  Sailing season is soon upon us!  Before you know it I will be sailing around in my Goat Island Skiff and rocking house, and maybe you will feel that kick in your pants to get outside and do some adventuring of your own!

As presented in my earlier post, I have some repairs that require my attention.  One of them is cosmetic by nature, and that's the pesky buckled buttstrap joints on my sides.  This buckledness was born from my inadequate gluing job many moons ago in my garage when my Goat was but an infant in many different pieces.  That being said, I am attempting to make correct this blemish.  I have posted this picture before, but here it is again:

Note joint
Boo buckled buttstrap joint.

I have been advised by Mik Storer (Goat Island Skiff designer you should know that by now) that the best way to tackle this issue is through the use of a "Payson Joint" which basically entails fairing the buckled portion, digging a trench to lay down some fiberglass tape and epoxy, and then sanding smooth and repainting.  A Payson Joint is a way to join two pieces of plywood together, and usually the trench and fiberglass tape are used on both sides of the joint.  It is a flexible, strong, and cosmetically innocuous way to join two pieces of ply together, since the tape lies in the trench that was hollowed out and doesn't bump up and out and sticks out.  It is strong, like bull, joint repair technique.

My repair only needed it done on one side, since I have a buttstrap on the inside of the joint.
First, I needed to sand away the paint from the bumped areas:

Starboard, note ghetto torture sanding board!

Port
You'll notice that on the port side I already have done some work, this was last spring before I painted.  I noticed the buckling before I applied the paint and I just ground it flat with my ROS and painted it.  It was suitable, but not ideal by any means.  The starboard side didn't show up until halfway through the season.

After the ridge was faired smooth it was time to "dig the trench" that would accept the fiberglass tape.  Here is the Starboard side trenched out.  The trench should not be more than a veneer, but after the fairing the first veneer was almost gone anyway, so it didn't take much to get down to the next layer.  The glue between veneers offered a good guideline too, visually offering the trench as opposed to feeling it out with my fingers.

Starboard trenched

 After the trenches were dug it was time to apply the fiberglass tape and thickened epoxy.  These would fill the trench and make everything smooth and fair.

Port side with fiberglass tape in trench
After this whole shebang cured, I have it a light sand to see if I had any hollows or ridges.

Starboard

Port
Obviously, I needed to do some filling, so QUICK FAIR TO THE RESCUE!

Starboard
After the Quick Fair set, I sanded it down until I got back to the epoxy.  Everything seemed smooth as a baby's bottom, so tonight I applied the first coat of primer.

This is the real test, the paint, because one's fingers can only feel so much, but glossy paint will show every flaw in your boat for the world to see!  Ugh.

My port side came out as good as it was going to come out.  I am pleased with the results.  My starboard side, ever my nemesis, came out almost just right, except on the bottom of the tape on the aft side.  There's a little ridge there than didn't get filled.  I mean, I have to be looking to see it.  My lovely wife basically told me to forget it.  My enabler told me to fix it.

Starboard

Also Starboard
Now please take note that this imperfection is actually almost impossible to see in any real world scenario.  I have to shine the flashlight "just so" to see it plainly.  On the water or on the trailer, no one will ever pick this up, I actually have to move about a bit in the garage to see it under normal light.

But I know it's there.  It's going to bug me, I did all this work, I'm going to have to fix it.  It's only one coat of primer that is meant to be sanded off anyway.  UGH.  So close.

My only fear is that I screw it up worse!

Oh, I also put in a plug in my daggerboard:


Check out the leaves that finally coming out! WOOT!

Sunday, March 20, 2011

It's SPRING!!! Repairs, finishing, and the Maine Boatbuilders Show!

This is a for-real AHOY MATEYS because IT. IS. SPRING.  (Insert cymbals here!)  Spring means:  Awesome.  Boats.  Sailing in my Goat Island Skiff.  More Awesome.  I am freaking out.

I ended winter with a bang-- and I drove all the way up to Portland Maine to attend the Maine Boatbuilders Show with one of my enabling buddies who helps convince me that boat related purchases will be beneficial to my life.  He is currently building a Ross Lillistone Phoenix III.  The boat show was awesome, with lots of boats, boat supplies, tools, and other sundries in multiple warehouses.  It was sweet.

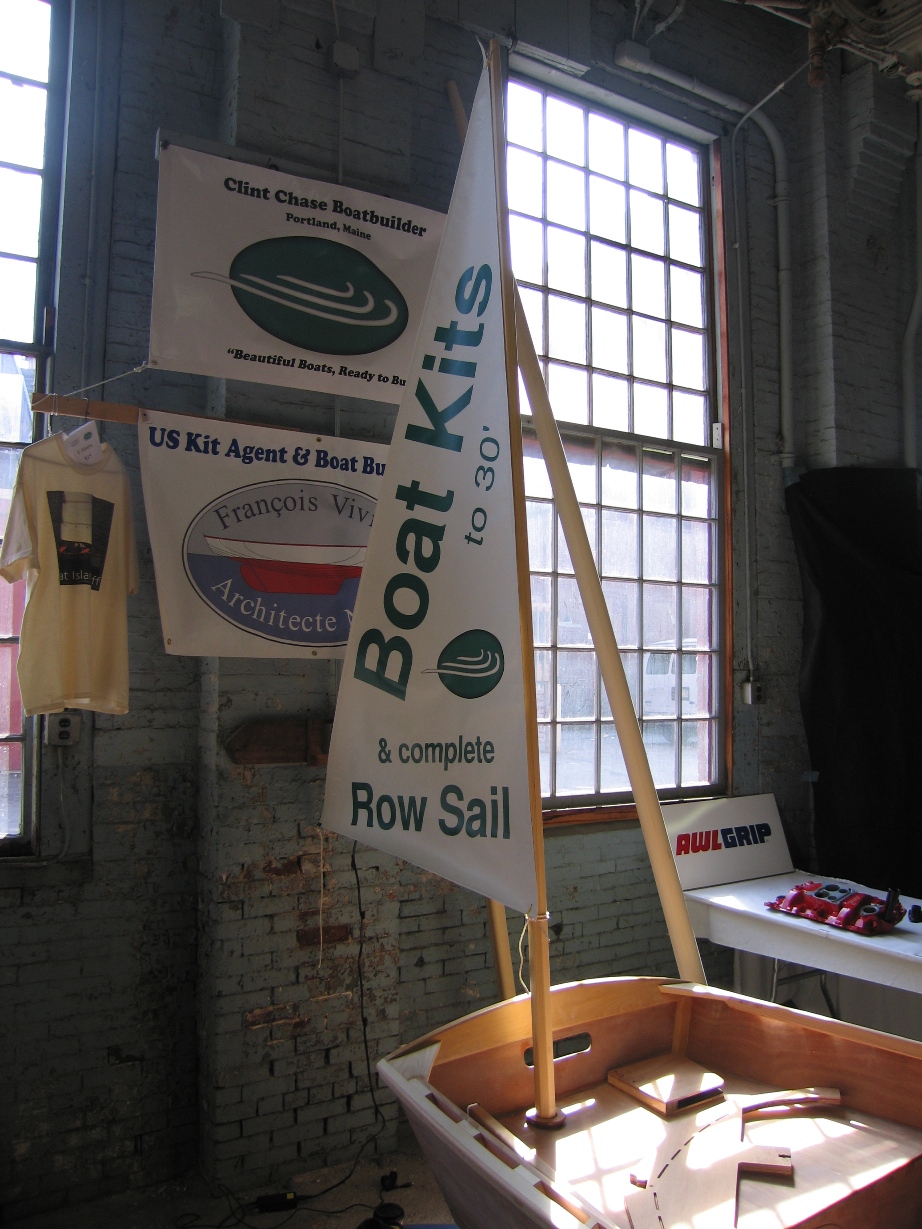
What was totally sweet, however, was Clint Chase Boat Builder who was an exhibitor in residence showing off one of his Goat Island Skiff kits!  Clint presciently brought in an unfinished kit because it was, after all, a boatbuilder show, so the Goat was in unfinished conditions-- demonstrating that the Goat is a realistic build for the amateur and is really not a very complicated boat after all.  The passer-by could actually see themselves building such a vessel, as opposed to some of the other boats that were in museum-quality finish.  In short, the Goat is an attainable boat for almost everybody!

Clint Chase and myself with Goat
Clint Chase was the designer of the very sexy mizzen/yawl retrofit/plan for the Goat Island Skiff.  Clint works magic with birdsmouth masts, mizzen masts, oars, whatever you want, and he dutifully provided some of his wares, including bringing the mizzen for this boat:


Nice!

Gawkers, gawking.
Apparently, Clint said the Goat was a hit.  Again, this is an affordable, attainable project for most people with/without experience, and out of the project, the builder gets a most capable boat.  What are you waiting for?!

I also must plug my homeys over at Maine Island Trail Association.  


That is Ted, who is awesome and posed in a picture with me, at the MITA booth.  The intreprid reader will remember that the MITA helps maintain the Maine Island Trail, and the author of this blog (me) uses this trail for adventures on the high seas!  I highly recommend anyone interested in cruising the Maine coast in small boats (or big) to become a member of this most worthwhile organization.  Go MITA, GO!  (I want that beard...)

***********************

In other news pertaining to my vessel, I have dragged her out into the sunlight on this first day of Spring!


Yes, it is Spring!  I have jumped into the boat repairs, and lemme tell you, dear intrepid reader, there is almost nothing like a sharp plane skinning away pieces of wood to bring a smile to this sailor's face!  Clint Chase's boat at the show is going to be a fine piece of vessel when she is finished, and I admired the small touches that he has gone through the trouble of doing to make her classy.  I was duly inspired, and have undertaken the task to clean my boat up and make her even more worthy of my pride!  I will admit, when I built her I didn't know what I was doing, and I also used her as an aggression sink, and I directed much work-related stress into her construction.  I rushed her finishing to get her on the water, and the entire season last year I made excuses for her rough fillets and unfinished edges.  Today, that ends.


I am rounding her off, literally taking off her sharp edges, softening her up, and getting her pretty so that this year, we will cruise with a new temperament, based on relaxation and fun.  Clint showed me how to shape fillets, and I don't know why I didn't try it earlier.  Thank you Clint for the inspiration!

Happy Spring, readers!

Wednesday, January 26, 2011

Winter repairs and hibernation

AHOY MATEYS!

It has been a few months since you've had a tasty morsel of an update from the world of my Goat Island Skiff, and this almost mid-winter update will focus on the damage incurred over the past 30 day (or so) season last year, and what needs to be fixed.  I took many of these pictures last fall for this post specifically, but decided to hold off posting until I got into a mood.  Today, while perusing some photos, I got in that mood.

To recap:  Last fall I needed to pull the plug on sailing, and I did that at Clint Chase's messabout.  There were a few more good days of sailing that season in early November, but the water was cold, and I had to draw the line somewhere.  Additionally, I wanted a warm day to wash the boat so I didn't have to do it in freezing temperatures, so when that day swung through with heavy fog, I took advantage of the opportunity and washed and stored my GIS.


As you can see in these following photographs, the hull fared quite well over the past season with minimal damage to her underside.  The intrepid reader will remember that she is not glassed out or in, only some tape along the chines.  I added a bow skid (not in plans) to take the brunt of grounding her on rocky New England coasts, and I'm glad I did.  In retrospect, I should have laid down some fiberglass cloth for abrasion/puncture resistance and skipped the bow skid, because rocks still punched through the ply-- indicated by the little spots speckled around the bow.  Those are not dirt marks, the hull has been washed, those are holes that punched through the outer veneers of the plywood and were quickly patched with epoxy during my busy season.  There are also many scrapes along the chines, which take a good beating.  Heavy fiberglass tape is essential here if you plan on adventure cruising your Goat Island Skiff along rocky shores.


Interestingly enough, the stern, even though it was repeatedly dragged around miscellaneous beaches, suffered almost no ill, it is shiny and smooth and in wonderfully good shape.


The daggerboard trunk took some hits with the daggerboard, everytime I hit something the board would slam against the aft end of the slot, and the plywood really got beaten up here.  I kept adding epoxy as the season went on to keep it sealed.  This winter I would like to add a heavy rubber or foam strip to cushion the board from doing such damage to the boat.  Apologies about the focus.


In the interior of the hull on bulkhead 3, there is this crack that runs up the port side to the seat, and stops were the plywood is backed by the seat cleat on the opposite side:


If you look carefully, it's that thin black crack that extends up from the corner.  I have no idea how that occurred, but my hunch is when I collided with rocks in the middle of the night in Casco Bay during the VisionQuest/ManQuest 2010.  My shipmate Jason detailed the accident here.  I was tossed over the center thwart, and my shin hit the bulkhead pretty hard during the collision-- so that is my hypothesis.

The floor of the boat has multiple dark stains throughout where objects were dropped and bailing buckets were scraped-- Storer does not recommend fiberglassing the interior of the boat either, but even with three coats of epoxy and 5 coats of varnish, I still was able to wear or puncture down to the plywood in multiple areas, which introduced water and stained the Okoume.


Notice the dark spot to the left of the yogurt container (dropped the anchor) and the multiple scrapes next to the chinelog in front of the sail (scraping from the bailer).  This is just an example, almost all quadrants of the floor exhibit these marks from wear and tear.  Unfortunately, I have non-skid down and sanding this down to get a good nice epoxy layer to cover this will be difficult.

Otherwise, things came through in decent shape over the season.  There is definite wear on all surfaces that rub, such as the inside of the daggerboard trunk, the mast partner and step, the inside of the rudder stock, bulkhead arms, gunwales, etc., but nothing that a touch of epoxy and varnish won't take care of.

The last item is the daggerboard itself, which took multiple hard hits over the season, and the trailing edge took a beating.  I had filled some of the beatings with thickened epoxy, but these end up harder than the wood around the filling, and when the trailing edge is smacked against the daggerboard case, it wipes out even larger areas of wood.


The crunch on the right was filled like the one on the left, but another grounding wreaked considerable havoc on the edge as you can see-- bummer.

Finally, I have a cosmetic issue that bugs the living crap out of me, and I would like to fix it if I can.  When I built the boat, I screwed up with the buttstraps that glue the two panels for the sides together.  I did it in a cold garage, I didn't use enough glue, and I didn't apply enough weight to the buttstrap.  My port side buckled outward a little bit and I faired it somewhat with a sander and called it good.  The starboard side was smooth and fair, but over the season it began to buckle a bit too.  This picture with my Goat Island Skiff friend Al from Brooklyn and me in Casco Bay shows the seam:


This clearly shows what I'm talking about.  It's actually quite minor, and barely noticeable unless the sun is at a low angle, and it doesn't affect performance, but it bugs me to no end!  ARGH I hate it!  So it must go.  Some sanding, some epoxy, some Quick Fair, and I hope it's good to go.

But, lets finish this post with a pretty picture of "I Am Zinea, Pterodactylus" ship shape and Bristol fashion for the winter season:


It was a pretty fall, and now it's winter.


I'm going for a schuss!

Tuesday, November 2, 2010

Quick Canoe

Since the Goat Island Skiff is laid up until next season, I nosed around the garage for a bit putting together a little somethingsomething that would get me out on the water.  The Goat is great, I love it, but something that could easily get onto the Merrimack River, which is close by, would be great.  Nothing like a little late fall paddle up a river with a float back down, right?  Right.

Enter:  3 sheets of Sureply vinyl floor underlayment from Lowes for 20 bucks a sheet.
Enter:  Miscellaneous wood left-over from the Goat.
Enter: A few quarts of Rustoleum (latex exterior house paint would've worked too) for 40 bucks.

ENTER:  QUICK CANOE


Add a little bit of your time, really, not much, and next thing you know, you have a canoe.

See the thread at Storer's Forum here.

A new design, less than a year old, and already many have been built all over the world.  Some are experimenting with sailing rigs.  Others made skinnier prototype versions.  It comes with solid, fast, inexpensive boatbuilding technique.  Yes, you could probably get on the water for less than 200 bucks.  What in the name of Poseidon are you waiting for!?!?